Revolutionize (or not) your email with image-to-html conversion
published on ,
updated on
Saaaaluuuut little email code geek! I've put together an article just for you: in this article, I'm going to tell you all about converting images into pure HTML and CSS code in an email. How did I come up with this idea? Let me explain: I often think about article topics as I drift off to sleep. Here's one that's been stuck in my head: how can I optimize the rendering of images in a Dark Mode email? Then I always have the same dream: I'm swimming in the Seine and suddenly I swallow a rat. Then I suffocate and sink. At the bottom, there are oysters, and they grab my ankles. So I threw up the rat on the oysters, the rat attacked the oysters, I surfaced, took a barge on the head and woke up.
The next day, I received an e-mail from IRO, which I opened on my dark mode cell phone. It was a perfect example. In this article, I'll be using the IRO brand.
Explanation of how to convert an image into HTML and CSS code
The principle is as follows: in one or more tables (<table>), each cell (<td>) represents a pixel of the selected image. CSS patches are applied to these cells to guarantee their width and height (1px), as well as an HTML attribute bgcolor attribute to set a background color for the cell. If sister cells have a similar background color, the colspan with the corresponding value is applied to limit the number of cells in each line, and therefore the final HTML code.
Example of a pixel-art visual of a computer with email.
In principle, we're very close to pixel art, a form of digital art in which images are created from small square elements called "pixels". The difference is that pixel art is all about "creating" images without worrying about sharpness, whereas our aim in this article is to "reproduce" an image as faithfully as possible, with one cell for each pixel of the original image.
The benefits of converting images into HTML and CSS code
Optimized rendering on Dark Mode
As a reminder, only JPEG, GIF and PNG are correctly supported on all opening environments. SVG, WEBP, AVIF, BASE 64, BMP, HDR, HEIFPPM, TIFF are good for the scrap heap. And supported formats don't automatically convert to Dark Mode. Why not? Simply because they're not "vector", of course!
The problem with an image is that in Dark Mode in an emailit will remain the same. In other words, an image of a black logo on a transparent background will remain a black logo on a transparent background in Dark Mode. But if the cell containing your image has a white background in Light Mode, how will it behave in Dark Mode? I'll tell you: the background will become dark, and your logo will no longer be visible/readable. Unless you add a drop shadow or border in the same color as your cell background...
Rendering of the PNG logo in a white background cell in Light Mode (left) and Dark Mode (right). Rendering in Dark Mode is unreadable/invisible.
So you might be tempted to design your images entirely in HTML and CSS, pixel art-style, so that the hexadecimal color codes are automatically converted when Dark Mode is activated. Legitimate, isn't it?
In short, it's for these and other reasons that it may be worthwhile to look at the conversion of images into HTML and CSS code. Because then, all hexadecimal codes in your cells will be converted. Your logo will then appear white (in principle) on a dark background.
Rendering an image converted to HTML and CSS code in Dark Mode
Immediate visual display
You know this message well, don't you? A "nightmare" for many email marketers. Imagine a world where it would no longer be necessary to press the "Show remote content in this message to display the visuals in your email... Wouldn't that be nice, hm? And I'm not talking about putting images in attachments, no no. That's dirty. I'm talking about images coded in HTML and CSS, which would then be displayed instantly in your email.
This is also the case in the code developed here for IRO: no need for hosted images! Just HTML code and zou! The logo is displayed. "It's lively. It has thighs, it attacks the palate dryly, it's not lacking in return. You can serve it!"
Optimized accessibility thanks to limited external resources
When it comes to accessibility, frankly, there's one advantage. It's small, but it's there: the ability to display an image without the need to download images. And therefore, also reducing the number of resources to be downloaded. And also because, as mentioned above, rendering in Dark Mode is optimized.
The disadvantages of converting images into HTML and CSS code
Weight of HTML file generated on conversion
Moooon-God-Noël-my-mother! My code hurts! Given that each pixel corresponds to a table cell, the weight of a simple 31px wide by 35px high visual, simply in black and white, is already quite substantial. The proof, ladies and gentlemen of the jury, is that the single letter "R" coded with this method reaches the staggering weight of 32.6kb! That's quite a lot.
Well, if the weight of the HTML code in our beloved emailings wasn't a constraint, I'd say: let's go crazy! To hell with stinginess! But that's to misunderstand the mischievous world of email marketing: Gmail, Orange... Many "cut" an email as soon as a weight limit is reached. Suffice it to say that with three simple letters weighing in at 8.19kb, 32.6kb and 43.1kb respectively, and a total weight (hang on to your hats) of 83.89kb, there's very little room for maneuver. All the more so as the generated code is not indented, and optimized to the maximum to reduce its weight! And that's saying a lot!
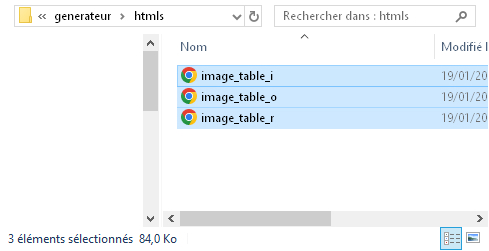
Weight of the HTML files of the three letters initially in images, converted into HTML and CSS code
Design limitations
As you'll have understood (or perhaps not, I can't blame you), to obtain a relatively light code, you'll need to apply this conversion to "basic" images, simple, with few colors, and not too large. Hence my next piece of advice: this can only be applied to logos or icons. And sparingly. It's not for nothing that the example chosen in this article is the IRO logo, uncluttered and minimalist as possible.
You should also choose images with sufficient contrast, so that the conversion script can distinguish each pixel as it runs.
Hyperlink impossible to apply
This is a nice little trap: to design these images in HTML and CSS, I use arrays (<table>). However, these arrays are elements of type table. However, a inlineas the <a>cannot include an element of type table. Not only this is not correct HTML-wisebut it can also generate rendering or usage problems. Forget about being able to insert a link on your logo: from now on, you can't make it clickable. You can try, but you're liable to break your teeth... "Put your mouth on the curb... Put your mouth on the kerb...".
Yes, I include accessibility in both the advantages AND the disadvantages. Why? Because even if the image is automatically downloaded and readable by everyone, it doesn't allow for alternative text. So.., if the rendering is distorted, it is impossible to understand the meaning of the design. Do you understand?
What's more, screen readers will, by default, consider this creation as a presentation HTML table. As recommended by Mark Robbins on the use of SVG in email, you'll probably need to specify a role attribute with the value presentation to all img element on your HTML-coded table, and include a </code> to enter an alternative text.</p>
<pre class="wp-block-code prettyprint"><code><table cellpadding="0" cellspacing="0" border="0" role="img">
<tr>
<td>
<title>Alt text</title>
[your HTML code]
</td>
</tr>
</table></code></pre>
<p class="wp-block-paragraph">And I'd just as soon tell you that I'm not responsible for the insertion of a <code><title></code> in a <code><table></code> !</p>
<h3 class="wp-block-heading" id="h-mise-a-jour-du-visuel">Visual update</h3>
<p class="wp-block-paragraph">While changing a logo or an image in PNG, JPG or GIF format is relatively quick (simply modify the visual in question on your design tool or prototyping platform, export it, host it and then change the path of the img tag in the HTML code), changing a logo/visual in HTML and CSS format requires a little more work:</p>
<ol class="wp-block-list">
<li>Visual update</li>
<li>Exporting visuals</li>
<li>Script modification</li>
<li>Running the script</li>
<li>Optimization of the generated test if necessary</li>
<li>Testing the generated code</li>
<li>Application of code in the final HTML file...</li>
</ol>
<p class="wp-block-paragraph">Keep this in mind - it's not an insignificant point!</p>
<h2 class="wp-block-heading" id="h-methodologie-a-adopter">Methodology to adopt</h2>
<h3 class="wp-block-heading" id="h-bonnes-pratiques">Best practices</h3>
<ul class="wp-block-list">
<li>Don't try to perform this type of transformation on complex, very large visuals, or with lots of colors.</li>
<li>Give preference to <strong>extremely simple visuals</strong>type <strong>logo </strong>or <strong>icon</strong>.</li>
<li>In the latter case, prepare a visual specific to this design on the prototyping platform of your choice, to simplify the logo design as much as possible.</li>
<li><strong>Don't try to perform this conversion "manually".</strong>Don't forget that a simple image measuring 31px wide by 35px high comprises - I'll put 3 and take 8: 31*35=1085 pixels. So that's as many cells to create. Good luck!</li>
</ul>
<h3 class="wp-block-heading" id="h-des-outils-pour-convertir-une-image-en-code-html-et-css">Tools for converting images into HTML and CSS code</h3>
<p class="wp-block-paragraph">I searched high and low for platforms offering conversion of images into HTML tables with inline CSS formatting, but came up empty! I was convinced I'd used this type of service 4 or 5 years ago. But so be it.</p>
<p class="wp-block-paragraph"><strong>I then created my own converter.</strong> Well, myself, that is: with the help of artificial intelligence. So I asked ChatGPT what language would allow this feat: in his opinion, Python would do the trick. I then asked him to create a Python script to achieve this conversion, and to explain to me how to execute the script (because, in case I need to point it out, I have no knowledge of Python). I must admit... I feel like a dwarf among giants... Here's the optimized script code:</p>
<pre class="wp-block-code prettyprint"><code>from PIL import Image
# Write below the name of the HTML file to be produced instead of image_table.html
def image_to_html_table(image_path, output_html='image_table.html', cell_size=1):
# Open the image
image = Image.open(image_path)
image = image.convert('RGB')
# Get the dimensions of the image
width, height = image.size
# Convert the image into a list of pixels
pixels = list(image.getdata())
pixels = [pixels[i * width:(i + 1) * width] for i in range(height)]
# Start the HTML table with 'role="presentation"'
html = '<table cellpadding="0" cellspacing="0" border="0" role="presentation">'
# Process each row of pixels
for row in pixels:
html += '<tr>'
current_color = None
colspan = 1
for pixel in row:
r, g, b = pixel
color = f'#{r:02x}{g:02x}{b:02x}'
if color == current_color:
colspan += 1
else:
if current_color:
style = f'width:{cell_size * colspan}px; height:{cell_size}px; font-size:1px; line-height:1px;'
if current_color != '#ffffff':
html += f'<td bgcolor="{current_color}" style="{style}" colspan="{colspan}"> </td>'
else:
html += f'<td style="{style}" colspan="{colspan}"> </td>'
current_color = color
colspan = 1
# Add the last sequence of pixels in the row
if current_color is not None:
style = f'width:{cell_size * colspan}px; height:{cell_size}px; font-size:1px; line-height:1px;'
if current_color != '#ffffff':
html += f'<td bgcolor="{current_color}" style="{style}" colspan="{colspan}"> </td>'
else:
html += f'<td style="{style}" colspan="{colspan}"> </td>'
html += '</tr>'
html += '</table>'
# Write the HTML table to a file
with open(output_html, 'w') as file:
file.write(html)
# Example of function usage
# Write below the name or path of your .jpg file in place of image.jpg
image_to_html_table('image.jpg')</code></pre>
<p class="wp-block-paragraph">And, as a gift, here are the steps to follow to execute this script, in case you'd like to test it or implement it on your own. You can keep the change, I don't mind... :</p>
<ol class="wp-block-list">
<li><strong>Copy this code</strong> and <strong>paste it into a new file on Notepad++.</strong>.</li>
<li><strong>Make the necessary changes</strong> in the script: change the name of the HTML file to be generated, change the name and/or path of the image concerned...</li>
<li><strong>Save the file</strong> in .py format (for example, script_conversion.py) in a folder named "generateur" on your desktop.</li>
<li>From your computer :
<ul class="wp-block-list">
<li>Under Windows, click on the search button at the bottom left of the screen; then type <code>cmd</code> and press "Enter". This opens a black window in which you can type command instructions.</li>
<li>On Mac, open the <em>"Terminal</em>. You can find it using <em>"Spotlight</em>.</li>
</ul>
</li>
<li>In the black window, use the <code>cd</code> followed by the path to the folder where the script is located. For example, if the script is on the Desktop, type <code>cd Office</code> (for Windows) or <code>cd Desktop</code> (on Mac) and press Enter. </li>
<li>Still in the black window, type <code>pip install Pillow</code> for <strong>install the library <em>Pillow</em></strong>.</li>
<li>Then <strong>go to the folder containing your script</strong>by typing, for example <code>cd Office</code>and then <code>generator cd</code>.</li>
<li>Finally, <strong>run the script</strong> by typing <code>python script_conversion.py</code> and press "Enter".</li>
<li>Your image is then normally converted into an HTML file with HTML tables and cells in your "generator" folder.</li>
</ol>
<h3 class="wp-block-heading" id="h-testez-le-code-genere">Test the generated code</h3>
<p class="wp-block-paragraph">After an initiative of this kind, I'll tell you right now: it's better to test! I had to create my own generator, add the CSS properties <code>font-size</code> and <code>line-height</code> with the value <code>1px</code>adapt it to optimize the output code... my final rendering results according to the opening environments are not entirely convincing: strange width at the beginning of the letter <em>" R "</em>slight offset on the letter <em>" O "</em>I'm far from a perfect rendering! And yet the logo selected was as simple as could be...</p>
<figure class="wp-block-image aligncenter size-large"><a href="https://www.badsender.com/wp-content/uploads/2024/01/test_email_preview_conversion_image_html.jpg"><img loading="lazy" decoding="async" width="1024" height="200" src="https://www.badsender.com/wp-content/uploads/2024/01/test_email_preview_conversion_image_html-1024x200.jpg" alt="" class="wp-image-568037" srcset="https://www.badsender.com/wp-content/uploads/2024/01/test_email_preview_conversion_image_html-1024x200.jpg 1024w, https://www.badsender.com/wp-content/uploads/2024/01/test_email_preview_conversion_image_html-300x59.jpg 300w, https://www.badsender.com/wp-content/uploads/2024/01/test_email_preview_conversion_image_html-768x150.jpg 768w, https://www.badsender.com/wp-content/uploads/2024/01/test_email_preview_conversion_image_html-18x4.jpg 18w, https://www.badsender.com/wp-content/uploads/2024/01/test_email_preview_conversion_image_html.jpg 1046w" sizes="(max-width: 1024px) 100vw, 1024px" /></a><figcaption class="wp-element-caption">Problems rendering an email preview of an image converted into HTML and CSS tables and cells</figcaption></figure>
<p class="wp-block-paragraph">And I definitely can't be satisfied with such a rendering. And neither can you. No. no no! THE WORLD IS GOING CRAZY! NO ONE BUT ME CARES ABOUT RESPECTING THE RULES ANYMORE 😀</p>
<h2 class="wp-block-heading" id="h-conclusion-nbsp-est-il-judicieux-de-convertir-une-image-en-tableaux-et-cellules-html-et-css-nbsp">Conclusion: is it a good idea to convert an image into HTML and CSS tables and cells?</h2>
<p class="wp-block-paragraph">I think the time has come to tell you what I've learned, to draw a conclusion, don't you? After many (cold) coffees, multiple tests and script optimization attempts, my conclusions are as follows: </p>
<ul class="wp-block-list">
<li>Converting an image into HTML and CSS can be interesting if you manage to <strong>reduce code weight as much as possible</strong> generated, and the <strong>rendering is tested and approved</strong>. However, this in no way solves the accessibility and click/link problems that are impossible to apply.</li>
<li>This type of manipulation can only be performed on <strong>extremely simple visuals</strong> graphically speaking: logos, icons...</li>
<li>I'm leaning towards abandoning this solution in view of the weight generated, which I find difficult to reduce drastically. I'm thinking more along the lines of <strong>adaptation of logo to text</strong> (when the logo is mainly text-based) <strong>with the closest possible websafe typography</strong> There are constraints in emailing, so it's not hard to imagine having <a href="https://www.badsender.com/en/guides/design-system-email/">recommendations right from the start of the email design</a> (logo, icon) with this type of suggestion, right?</li>
<li>If you prefer to stick to the traditional method, designing a logo in PNG format with a transparent background and a minimum of work for correct rendering in Dark Mode (border or drop shadow in the same color as the background color of the cell) will do just as well.</li>
<li>In an ideal world, I'd look for a solution that combines an SVG image format with a fallback solution in case the SVG format isn't supported. In fact, I invite you to read Mark Robbins' article about the <a href="https://www.goodemailcode.com/email-enhancements/svg">SVG format in emails</a>.</li>
</ul>
<p class="wp-block-paragraph">Nota bene: I'm clearly no expert in Python scripting. I don't even know anything about it, to be honest. So I'm leaning towards optimizing the script and the generated code. So I'm all ears for your advice, opinions and recommendations!</p>
<script src="https://cdn.jsdelivr.net/gh/google/code-prettify@master/loader/run_prettify.js?autoload=true&skin=sunburst&lang=css" defer=""></script>
</div><!-- Reactions block: No reactions found. -->
<div class="wp-block-template-part">
<div class="wp-block-group has-yellow-background-color has-background has-global-padding is-layout-constrained wp-container-core-group-is-layout-88776491 wp-block-group-is-layout-constrained" style="padding-top:var(--wp--preset--spacing--24);padding-right:var(--wp--preset--spacing--24);padding-bottom:var(--wp--preset--spacing--24);padding-left:var(--wp--preset--spacing--24)">
<div class="wp-block-columns alignwide is-layout-flex wp-container-core-columns-is-layout-c767d2a9 wp-block-columns-is-layout-flex">
<div class="wp-block-column is-vertically-aligned-center is-layout-flow wp-block-column-is-layout-flow">
<h2 class="wp-block-heading has-title-4-font-size">Support the "<span lang="en">Email Expiration Date</span>"</h2>
</div>
<div class="wp-block-column is-layout-flow wp-container-core-column-is-layout-b392f91c wp-block-column-is-layout-flow">
<p class="wp-block-paragraph">
<strong><a href="https://www.brevo.com/fr/">Brevo</a> and <a href="https://www.cofidis.fr/fr/index.html">Cofidis</a> financially support the project.</strong> Join the movement and together, let's make the email industry take responsibility for the climate emergency.
</p>
<div class="wp-block-buttons is-layout-flex wp-block-buttons-is-layout-flex">
<div class="wp-block-button"><a class="wp-block-button__link wp-element-button" href="https://www.badsender.com/en/support-expiration-date-email/">I want to know more</a></div>
</div>
</div>
</div>
</div>
</div>
</div>
<div class="wp-block-template-part">
<div class="wp-block-group badsender-parts-share has-global-padding is-layout-constrained wp-container-core-group-is-layout-2a3a6351 wp-block-group-is-layout-constrained" style="padding-top:var(--wp--preset--spacing--24);padding-bottom:var(--wp--preset--spacing--24);">
<p class="has-text-align-center has-large-font-size wp-block-paragraph">
<strong>Share</strong>
</p>
<ul class="wp-block-social-links has-icon-color has-icon-background-color is-horizontal is-content-justification-center is-layout-flex wp-container-core-social-links-is-layout-cad2de74 wp-block-social-links-is-layout-flex">
<li style="color:#FFFFFF;background-color:#000000" class="wp-social-link wp-social-link-facebook has-base-color has-contrast-background-color wp-block-social-link"><a href="https://www.facebook.com/sharer.php?u=https://www.badsender.com/en/2024/01/22/conversion-image-code-html-css/" class="wp-block-social-link-anchor"><svg width="24" height="24" viewbox="0 0 24 24" version="1.1" xmlns="http://www.w3.org/2000/svg" aria-hidden="true" focusable="false"><path d="M12 2C6.5 2 2 6.5 2 12c0 5 3.7 9.1 8.4 9.9v-7H7.9V12h2.5V9.8c0-2.5 1.5-3.9 3.8-3.9 1.1 0 2.2.2 2.2.2v2.5h-1.3c-1.2 0-1.6.8-1.6 1.6V12h2.8l-.4 2.9h-2.3v7C18.3 21.1 22 17 22 12c0-5.5-4.5-10-10-10z"></path></svg><span class="wp-block-social-link-label screen-reader-text">Facebook</span></a></li>
<li style="color:#FFFFFF;background-color:#000000" class="wp-social-link wp-social-link-twitter has-base-color has-contrast-background-color wp-block-social-link"><a href="https://twitter.com/intent/tweet?text=https://www.badsender.com/en/2024/01/22/conversion-image-code-html-css/" class="wp-block-social-link-anchor"><svg width="24" height="24" viewbox="0 0 24 24" version="1.1" xmlns="http://www.w3.org/2000/svg" aria-hidden="true" focusable="false"><path d="M22.23,5.924c-0.736,0.326-1.527,0.547-2.357,0.646c0.847-0.508,1.498-1.312,1.804-2.27 c-0.793,0.47-1.671,0.812-2.606,0.996C18.324,4.498,17.257,4,16.077,4c-2.266,0-4.103,1.837-4.103,4.103 c0,0.322,0.036,0.635,0.106,0.935C8.67,8.867,5.647,7.234,3.623,4.751C3.27,5.357,3.067,6.062,3.067,6.814 c0,1.424,0.724,2.679,1.825,3.415c-0.673-0.021-1.305-0.206-1.859-0.513c0,0.017,0,0.034,0,0.052c0,1.988,1.414,3.647,3.292,4.023 c-0.344,0.094-0.707,0.144-1.081,0.144c-0.264,0-0.521-0.026-0.772-0.074c0.522,1.63,2.038,2.816,3.833,2.85 c-1.404,1.1-3.174,1.756-5.096,1.756c-0.331,0-0.658-0.019-0.979-0.057c1.816,1.164,3.973,1.843,6.29,1.843 c7.547,0,11.675-6.252,11.675-11.675c0-0.178-0.004-0.355-0.012-0.531C20.985,7.47,21.68,6.747,22.23,5.924z"></path></svg><span class="wp-block-social-link-label screen-reader-text">Twitter</span></a></li>
<li style="color:#FFFFFF;background-color:#000000" class="wp-social-link wp-social-link-linkedin has-base-color has-contrast-background-color wp-block-social-link"><a href="https://www.linkedin.com/sharing/share-offsite/?url=https://www.badsender.com/en/2024/01/22/conversion-image-code-html-css/" class="wp-block-social-link-anchor"><svg width="24" height="24" viewbox="0 0 24 24" version="1.1" xmlns="http://www.w3.org/2000/svg" aria-hidden="true" focusable="false"><path d="M19.7,3H4.3C3.582,3,3,3.582,3,4.3v15.4C3,20.418,3.582,21,4.3,21h15.4c0.718,0,1.3-0.582,1.3-1.3V4.3 C21,3.582,20.418,3,19.7,3z M8.339,18.338H5.667v-8.59h2.672V18.338z M7.004,8.574c-0.857,0-1.549-0.694-1.549-1.548 c0-0.855,0.691-1.548,1.549-1.548c0.854,0,1.547,0.694,1.547,1.548C8.551,7.881,7.858,8.574,7.004,8.574z M18.339,18.338h-2.669 v-4.177c0-0.996-0.017-2.278-1.387-2.278c-1.389,0-1.601,1.086-1.601,2.206v4.249h-2.667v-8.59h2.559v1.174h0.037 c0.356-0.675,1.227-1.387,2.526-1.387c2.703,0,3.203,1.779,3.203,4.092V18.338z"></path></svg><span class="wp-block-social-link-label screen-reader-text">LinkedIn</span></a></li>
<li style="color:#FFFFFF;background-color:#000000" class="wp-social-link wp-social-link-mail has-base-color has-contrast-background-color wp-block-social-link"><a href="mailto:?body=https://www.badsender.com/en/2024/01/22/conversion-image-code-html-css/" class="wp-block-social-link-anchor"><svg width="24" height="24" viewbox="0 0 24 24" version="1.1" xmlns="http://www.w3.org/2000/svg" aria-hidden="true" focusable="false"><path d="M19,5H5c-1.1,0-2,.9-2,2v10c0,1.1.9,2,2,2h14c1.1,0,2-.9,2-2V7c0-1.1-.9-2-2-2zm.5,12c0,.3-.2.5-.5.5H5c-.3,0-.5-.2-.5-.5V9.8l7.5,5.6,7.5-5.6V17zm0-9.1L12,13.6,4.5,7.9V7c0-.3.2-.5.5-.5h14c.3,0,.5.2.5.5v.9z"></path></svg><span class="wp-block-social-link-label screen-reader-text">Mail</span></a></li>
</ul>
</div>
</div>
<div class="wp-block-template-part"></div>
</div>
<div class="wp-block-group alignfull has-grey-background-background-color has-background has-global-padding is-layout-constrained wp-container-core-group-is-layout-0e75008e wp-block-group-is-layout-constrained" style="padding-top:3.75rem;padding-bottom:3.75rem;margin-top:0;margin-bottom:0;">
<div class="wp-block-group has-global-padding is-layout-constrained wp-container-core-group-is-layout-4ec46fd7 wp-block-group-is-layout-constrained">
<h2 class="wp-block-heading has-title-4-font-size" style="margin-bottom:var(--wp--preset--spacing--24)">The author</h2>
<div class="wp-block-columns is-layout-flex wp-container-core-columns-is-layout-1ef73651 wp-block-columns-is-layout-flex">
<div class="wp-block-column is-layout-flow wp-block-column-is-layout-flow" style="flex-basis:7.5rem;">
<div class="wp-block-avatar"><a href="https://www.badsender.com/en/author/tde/" target="_self" class="wp-block-avatar__link"><img alt='Thomas Defossez Avatar' src='https://secure.gravatar.com/avatar/40da7932cfcb25170ac6926b2a41b4c98a1401ccab617ed3fab8666979f1a73a?s=120&d=mm&r=g' srcset='https://secure.gravatar.com/avatar/40da7932cfcb25170ac6926b2a41b4c98a1401ccab617ed3fab8666979f1a73a?s=240&d=mm&r=g 2x' class='avatar avatar-120 photo wp-block-avatar__image' height='120' width='120' decoding='async'/></a></div>
</div>
<div class="wp-block-column is-layout-flow wp-block-column-is-layout-flow">
<div class="wp-block-post-author-name"><a href="https://www.badsender.com/en/author/tde/" target="_self" class="wp-block-post-author-name__link">Thomas Defossez</a></div>
<div style="margin-top:0;margin-bottom:var(--wp--preset--spacing--16)" class="wp-block-post-author-biography">Thomas began his career as an email integrator at Experian before setting up his own web agency. Today, Thomas has decided to focus on email in order to become a specialist in HTML integration for this medium. Since the end of 2014, Thomas has been working on various projects for Agence Badsender.com.</div>
<div class="wp-block-buttons is-layout-flex wp-block-buttons-is-layout-flex">
<div class="wp-block-button is-style-fill"><a href="https://www.badsender.com/en/author/tde/" class="wp-block-button__link has-base-color has-contrast-background-color has-text-color has-background has-link-color wp-element-button">All publications<span class="screen-reader-text"> by Thomas Defossez</span></a></div>
</div>
</div>
</div>
</div>
<div class="wp-block-columns is-layout-flex wp-container-core-columns-is-layout-81c55c1a wp-block-columns-is-layout-flex" style="border-top-color:var(--wp--preset--color--grey-border);border-top-style:solid;border-top-width:1px;margin-top:var(--wp--preset--spacing--48);padding-top:var(--wp--preset--spacing--24)">
<div class="wp-block-column is-layout-flow wp-block-column-is-layout-flow">
<div class="post-navigation-link-previous wp-block-post-navigation-link"><span class="post-navigation-link__label">Previous</span> <a href="https://www.badsender.com/en/2024/01/19/sweego-notification-email/" rel="prev">Sweego: Revolutionizing notification with a European 100% solution</a></div>
</div>
<div class="wp-block-column is-layout-flow wp-block-column-is-layout-flow">
<div class="post-navigation-link-next wp-block-post-navigation-link"><span class="post-navigation-link__label">Next</span> <a href="https://www.badsender.com/en/2024/01/22/eloqua-email-builder/" rel="next">Our opinion on Eloqua's email editor</a></div>
</div>
</div>
</div>
<div class="wp-block-group alignfull has-base-background-color has-background has-global-padding is-layout-constrained wp-container-core-group-is-layout-0e75008e wp-block-group-is-layout-constrained" style="padding-top:3.75rem;padding-bottom:3.75rem;margin-top:0;margin-bottom:0;">
<div class="wp-block-group has-global-padding is-layout-constrained wp-container-core-group-is-layout-4ec46fd7 wp-block-group-is-layout-constrained">
<h2 id="comments" class="wp-block-comments-title has-title-4-font-size">2 responses</h2>
<ol class="wp-block-comment-template"><li id="comment-597298" class="comment even thread-even depth-1">
<div class="wp-block-group is-layout-flow wp-block-group-is-layout-flow" style="padding-top:var(--wp--preset--spacing--32);padding-bottom:var(--wp--preset--spacing--32)">
<div class="wp-block-columns is-not-stacked-on-mobile is-layout-flex wp-container-core-columns-is-layout-f03ca32f wp-block-columns-is-layout-flex">
<div class="wp-block-column is-layout-flow wp-block-column-is-layout-flow" style="flex-basis:2.625rem;">
<div class="wp-block-avatar"><img alt='florence bruno Avatar' src='https://secure.gravatar.com/avatar/b70da5cf49cd675ac4b932c6e220d3322ecf127a754cf9932681f0e38e20e27e?s=42&d=mm&r=g' srcset='https://secure.gravatar.com/avatar/b70da5cf49cd675ac4b932c6e220d3322ecf127a754cf9932681f0e38e20e27e?s=84&d=mm&r=g 2x' class='avatar avatar-42 photo wp-block-avatar__image' height='42' width='42' decoding='async'/></div>
</div>
<div class="wp-block-column is-layout-flow wp-block-column-is-layout-flow">
<div class="wp-block-group is-content-justification-space-between is-layout-flex wp-container-core-group-is-layout-14e13169 wp-block-group-is-layout-flex">
<div class="wp-block-comment-author-name has-sm-font-size">florence bruno</div>
<div class="wp-block-comment-date has-sm-font-size"><time datetime="2024-01-24T12:47:48+01:00"><a href="https://www.badsender.com/en/2024/01/22/conversion-image-code-html-css/#comment-597298">2 years ago</a></time></div>
</div>
</div>
</div>
<div class="wp-block-comment-content has-sm-font-size"><p>Wow Thomas, what energy on this rarely treated subject 🙂 and well treated at that!!!</p>
</div>
<div class="wp-block-group is-nowrap is-layout-flex wp-container-core-group-is-layout-9ba6dbca wp-block-group-is-layout-flex">
<div class="wp-block-comment-reply-link"><a rel="nofollow" class="comment-reply-link" href="#comment-597298" data-commentid="597298" data-postid="567971" data-belowelement="comment-597298" data-respondelement="respond" data-replyto="Reply to florence bruno" aria-label="Reply to florence bruno">Reply</a></div>
</div>
</div>
</li><li id="comment-597613" class="comment byuser comment-author-tde bypostauthor odd alt thread-odd thread-alt depth-1">
<div class="wp-block-group is-layout-flow wp-block-group-is-layout-flow" style="padding-top:var(--wp--preset--spacing--32);padding-bottom:var(--wp--preset--spacing--32)">
<div class="wp-block-columns is-not-stacked-on-mobile is-layout-flex wp-container-core-columns-is-layout-f03ca32f wp-block-columns-is-layout-flex">
<div class="wp-block-column is-layout-flow wp-block-column-is-layout-flow" style="flex-basis:2.625rem;">
<div class="wp-block-avatar"><img alt='Thomas Defossez Avatar' src='https://secure.gravatar.com/avatar/40da7932cfcb25170ac6926b2a41b4c98a1401ccab617ed3fab8666979f1a73a?s=42&d=mm&r=g' srcset='https://secure.gravatar.com/avatar/40da7932cfcb25170ac6926b2a41b4c98a1401ccab617ed3fab8666979f1a73a?s=84&d=mm&r=g 2x' class='avatar avatar-42 photo wp-block-avatar__image' height='42' width='42' decoding='async'/></div>
</div>
<div class="wp-block-column is-layout-flow wp-block-column-is-layout-flow">
<div class="wp-block-group is-content-justification-space-between is-layout-flex wp-container-core-group-is-layout-14e13169 wp-block-group-is-layout-flex">
<div class="wp-block-comment-author-name has-sm-font-size">Thomas Defossez</div>
<div class="wp-block-comment-date has-sm-font-size"><time datetime="2024-01-26T09:50:13+01:00"><a href="https://www.badsender.com/en/2024/01/22/conversion-image-code-html-css/#comment-597613">2 years ago</a></time></div>
</div>
</div>
</div>
<div class="wp-block-comment-content has-sm-font-size"><p>Thanks Bruno! I put a lot of energy into it, as I'm always intrigued by this type of testing, R&D 🙂 Unfortunately, the conclusions I draw from these tests tell me that it's not necessarily a solution to adopt 😀 In any case, thanks for your comment!</p>
</div>
<div class="wp-block-group is-nowrap is-layout-flex wp-container-core-group-is-layout-9ba6dbca wp-block-group-is-layout-flex">
<div class="wp-block-comment-reply-link"><a rel="nofollow" class="comment-reply-link" href="#comment-597613" data-commentid="597613" data-postid="567971" data-belowelement="comment-597613" data-respondelement="respond" data-replyto="Reply to Thomas Defossez" aria-label="Reply to Thomas Defossez">Reply</a></div>
</div>
</div>
</li></ol>
<div id="respond" class="comment-respond wp-block-post-comments-form">
<h3 id="reply-title" class="comment-reply-title">Leave a Reply <small><a rel="nofollow" id="cancel-comment-reply-link" href="/en/2024/01/22/conversion-image-code-html-css/#respond" style="display:none;">Cancel reply</a></small></h3><form action="https://www.badsender.com/wp-comments-post.php" method="post" id="commentform" class="comment-form" data-trp-original-action="https://www.badsender.com/wp-comments-post.php"><p class="comment-notes"><span id="email-notes">Your email address will not be published.</span> <span class="required-field-message">Required fields are marked <span class="required">*</span></span></p><p class="comment-form-comment"><label for="comment">How <span class="required">*</span></label> <textarea id="comment" name="comment" cols="45" rows="8" maxlength="65525" required></textarea></p><p class="comment-form-author"><label for="author">Name <span class="required">*</span></label> <input id="author" name="author" type="text" value="" size="30" maxlength="245" autocomplete="name" required /></p>
<p class="comment-form-email"><label for="email">Email <span class="required">*</span></label> <input id="email" name="email" type="email" value="" size="30" maxlength="100" aria-describedby="email-notes" autocomplete="email" required /></p>
<p class="comment-form-url"><label for="url">Website</label> <input id="url" name="url" type="url" value="" size="30" maxlength="200" autocomplete="url" /></p>
<p class="comment-form-cookies-consent"><input id="wp-comment-cookies-consent" name="wp-comment-cookies-consent" type="checkbox" value="yes" /> <label for="wp-comment-cookies-consent">Save my name, email, and website in this browser for the next time I comment.</label></p>
<p class="form-submit"><input name="submit" type="submit" id="submit" class="submit" value="Post Comment" /> <input type='hidden' name='comment_post_ID' value='567971' id='comment_post_ID' />
<input type='hidden' name='comment_parent' id='comment_parent' value='0' />
</p><p style="display: none;"><input type="hidden" id="akismet_comment_nonce" name="akismet_comment_nonce" value="20fd3777bc" /></p><p style="display: none !important;" class="akismet-fields-container" data-prefix="ak_"><label>Δ<textarea name="ak_hp_textarea" cols="45" rows="8" maxlength="100"></textarea></label><input type="hidden" id="ak_js_1" name="ak_js" value="172"/><script>
document.getElementById( "ak_js_1" ).setAttribute( "value", ( new Date() ).getTime() );
</script>
</p><input type="hidden" name="trp-form-language" value="en"/></form> </div><!-- #respond -->
</div>
</div>
</main>
<div class="wp-block-template-part"><footer data-elementor-type="footer" data-elementor-id="14487" class="elementor elementor-14487 elementor-location-footer" data-elementor-post-type="elementor_library">
<div class="elementor-element elementor-element-24ba4e8 e-flex e-con-boxed e-con e-parent" data-id="24ba4e8" data-element_type="container" data-settings="{"background_background":"classic"}">
<div class="e-con-inner">
<div class="elementor-element elementor-element-1144a85 e-con-full e-flex e-con e-child" data-id="1144a85" data-element_type="container">
<div class="elementor-element elementor-element-c3f1376 elementor-widget elementor-widget-image" data-id="c3f1376" data-element_type="widget" data-widget_type="image.default">
<div class="elementor-widget-container">
<a href="https://www.badsender.com/en/">
<img loading="lazy" decoding="async" width="192" height="48" src="https://www.badsender.com/wp-content/uploads/2023/06/Logo.svg" class="attachment-full size-full wp-image-559948" alt="Badsender" /> </a>
</div>
</div>
<div class="elementor-element elementor-element-3ed2e47 elementor-widget elementor-widget-text-editor" data-id="3ed2e47" data-element_type="widget" data-widget_type="text-editor.default">
<div class="elementor-widget-container">
<p>Committed experts in emailing, deliverability and CRM</p> </div>
</div>
<!-- dce invisible element b91c24c --> </div>
<div class="elementor-element elementor-element-788e8cc e-con-full e-flex e-con e-child" data-id="788e8cc" data-element_type="container">
<div class="elementor-element elementor-element-8da28b5 elementor-widget elementor-widget-text-editor" data-id="8da28b5" data-element_type="widget" data-widget_type="text-editor.default">
<div class="elementor-widget-container">
<p>Follow us <a href="https://www.badsender.com/en/newsletter/registration/">via our newsletter</a>on <a href="https://www.linkedin.com/company/badsender/" target="_blank" rel="noopener">Linkedin</a>, <a href="https://www.youtube.com/channel/UCgRBfIEah50OIsdXlYclZxw" target="_blank" rel="noopener">Youtube</a>, <a href="https://www.badsender.com/en/articles/feed/">in RSS feed</a><br />Podcast Badsender (<a href="https://open.spotify.com/show/3YZTeq2TpICcNByyXZdd3n">Spotify</a>, <a href="https://podcasts.apple.com/us/podcast/badsender-agitateurs-demails/id1504855049">Apple Podcast</a>, <a href="https://www.deezer.com/fr/show/991392">Deezer</a>)<br />Non mais concrètement podcast (<a href="https://open.spotify.com/show/4zQjgAEaOBLvDHtKU3YHUz">Spotify</a>, <a href="https://podcasts.apple.com/fr/podcast/non-mais-concr%C3%A8tement-comment-on-fait-la-transition/id1647802411">Apple Podcast</a>, <a href="https://www.deezer.com/fr/show/4703327">Deezer</a>)<br />2025 - Badsender</p> </div>
</div>
<div class="elementor-element elementor-element-a92a3c9 elementor-widget elementor-widget-text-editor" data-id="a92a3c9" data-element_type="widget" data-widget_type="text-editor.default">
<div class="elementor-widget-container">
<p>Website illustrations sourced from <a href="https://icones8.fr/illustrations/style--3d-flame" target="_blank" rel="noopener">Icons8 (Flame 3D library)</a> and thanks to <a href="https://dribbble.com/thierryfousse" target="_blank" rel="noopener">the wonderful work by Thierry Fousse</a> ! Images highlighting the articles, most of them from the website <a href="https://unsplash.com/">Unsplash.com</a>. </p> </div>
</div>
</div>
<div class="elementor-element elementor-element-f43e598 e-con-full e-flex e-con e-child" data-id="f43e598" data-element_type="container">
<div class="elementor-element elementor-element-7c5338b elementor-nav-menu--dropdown-none elementor-nav-menu__align-end elementor-widget elementor-widget-nav-menu" data-id="7c5338b" data-element_type="widget" data-settings="{"layout":"vertical","submenu_icon":{"value":"<i class=\"\"><\/i>","library":""}}" data-widget_type="nav-menu.default">
<div class="elementor-widget-container">
<nav aria-label="Menu" class="elementor-nav-menu--main elementor-nav-menu__container elementor-nav-menu--layout-vertical e--pointer-none">
<ul id="menu-1-7c5338b" class="elementor-nav-menu sm-vertical"><li class="menu-item menu-item-type-post_type menu-item-object-page menu-item-privacy-policy menu-item-508446"><a rel="privacy-policy" href="https://www.badsender.com/en/private-life/" class="elementor-item">Privacy Policy</a></li>
<li class="menu-item menu-item-type-post_type menu-item-object-page menu-item-508444"><a href="https://www.badsender.com/en/endorsements/" class="elementor-item">Legal information</a></li>
</ul> </nav>
<nav class="elementor-nav-menu--dropdown elementor-nav-menu__container" aria-hidden="true">
<ul id="menu-2-7c5338b" class="elementor-nav-menu sm-vertical"><li class="menu-item menu-item-type-post_type menu-item-object-page menu-item-privacy-policy menu-item-508446"><a rel="privacy-policy" href="https://www.badsender.com/en/private-life/" class="elementor-item" tabindex="-1">Privacy Policy</a></li>
<li class="menu-item menu-item-type-post_type menu-item-object-page menu-item-508444"><a href="https://www.badsender.com/en/endorsements/" class="elementor-item" tabindex="-1">Legal information</a></li>
</ul> </nav>
</div>
</div>
</div>
</div>
</div>
</footer></div>
</div>
<template id="tp-language" data-tp-language="en_US"></template><script type="speculationrules">
{"prefetch":[{"source":"document","where":{"and":[{"href_matches":"/en/*"},{"not":{"href_matches":["/wp-*.php","/wp-admin/*","/wp-content/uploads/*","/wp-content/*","/wp-content/plugins/*","/wp-content/themes/badsender/*","/wp-content/themes/hello-elementor/*","/en/*\\?(.+)"]}},{"not":{"selector_matches":"a[rel~=\"nofollow\"]"}},{"not":{"selector_matches":".no-prefetch, .no-prefetch a"}}]},"eagerness":"conservative"}]}
</script>
<!-- Consent Management powered by Complianz | GDPR/CCPA Cookie Consent https://wordpress.org/plugins/complianz-gdpr -->
<div id="cmplz-cookiebanner-container"><div id="cmplz-cookiebanner-1-optin" class="cmplz-cookiebanner cmplz-hidden banner-1 bottom-right-view-preferences optin cmplz-bottom-right cmplz-categories-type-view-preferences" aria-modal="true" data-nosnippet="true" role="dialog" aria-live="polite" aria-labelledby="cmplz-header-1-optin" aria-describedby="cmplz-message-1-optin">
<div class="cmplz-header">
<div class="cmplz-logo"></div>
<div class="cmplz-title" id="cmplz-header-1-optin">Yes, we use cookies too</div>
<div class="cmplz-close" tabindex="0" role="button" aria-label="Close dialog" data-no-translation-aria-label="">
<svg aria-hidden="true" focusable="false" data-prefix="fas" data-icon="times" class="svg-inline--fa fa-times fa-w-11" role="img" xmlns="http://www.w3.org/2000/svg" viewbox="0 0 352 512"><path fill="currentColor" d="M242.72 256l100.07-100.07c12.28-12.28 12.28-32.19 0-44.48l-22.24-22.24c-12.28-12.28-32.19-12.28-44.48 0L176 189.28 75.93 89.21c-12.28-12.28-32.19-12.28-44.48 0L9.21 111.45c-12.28 12.28-12.28 32.19 0 44.48L109.28 256 9.21 356.07c-12.28 12.28-12.28 32.19 0 44.48l22.24 22.24c12.28 12.28 32.2 12.28 44.48 0L176 322.72l100.07 100.07c12.28 12.28 32.2 12.28 44.48 0l22.24-22.24c12.28-12.28 12.28-32.19 0-44.48L242.72 256z"></path></svg>
</div>
</div>
<div class="cmplz-divider cmplz-divider-header"></div>
<div class="cmplz-body">
<div class="cmplz-message" id="cmplz-message-1-optin">We don't use them for advertising or retargeting, but to make your browsing easier (for example, to watch our live shows, we need you to accept Youtube cookies). That's all we do.<br />
<br />
We use Matomo with anonymized audience tracking and that's cool.</div>
<!-- categories start -->
<div class="cmplz-categories">
<div class="cmplz-category cmplz-functional">
<div class="cmplz-category-header">
<span class="cmplz-category-title" id="cmplz-title-functional-1-optin">Functional</span>
<span class='cmplz-always-active'>
<span class="cmplz-banner-checkbox">
<input type="checkbox"
id="cmplz-functional-optin"
data-category="cmplz_functional"
class="cmplz-consent-checkbox cmplz-functional"
size="40"
value="1"/>
<label class="cmplz-label" for="cmplz-functional-optin"><span class="screen-reader-text">Functional</span></label>
</span>
Toujours activé </span>
<button class="cmplz-category-toggle"
aria-expanded="false"
aria-controls="cmplz-desc-functional-1-optin"
aria-labelledby="cmplz-title-functional-1-optin">
<span class="cmplz-icon cmplz-open">
<svg aria-hidden="true" focusable="false" xmlns="http://www.w3.org/2000/svg" viewbox="0 0 448 512" height="18"><path d="M224 416c-8.188 0-16.38-3.125-22.62-9.375l-192-192c-12.5-12.5-12.5-32.75 0-45.25s32.75-12.5 45.25 0L224 338.8l169.4-169.4c12.5-12.5 32.75-12.5 45.25 0s12.5 32.75 0 45.25l-192 192C240.4 412.9 232.2 416 224 416z"/></svg>
</span>
</button>
</div>
<div class="cmplz-description" id="cmplz-desc-functional-1-optin" hidden>
<span class="cmplz-description-functional">The storage or technical access is strictly necessary for the purpose of legitimate interest to enable the use of a specific service explicitly requested by the subscriber or user, or for the sole purpose of carrying out the transmission of a communication over an electronic communications network.</span>
</div>
</div>
<div class="cmplz-category cmplz-preferences">
<div class="cmplz-category-header">
<span class="cmplz-category-title" id="cmplz-title-preferences-1-optin">Preferences</span>
<span class="cmplz-banner-checkbox">
<input type="checkbox"
id="cmplz-preferences-optin"
data-category="cmplz_preferences"
class="cmplz-consent-checkbox cmplz-preferences"
size="40"
value="1"/>
<label class="cmplz-label" for="cmplz-preferences-optin"><span class="screen-reader-text">Preferences</span></label>
</span>
<button class="cmplz-category-toggle"
aria-expanded="false"
aria-controls="cmplz-desc-preferences-1-optin"
aria-labelledby="cmplz-title-preferences-1-optin">
<span class="cmplz-icon cmplz-open">
<svg aria-hidden="true" focusable="false" xmlns="http://www.w3.org/2000/svg" viewbox="0 0 448 512" height="18"><path d="M224 416c-8.188 0-16.38-3.125-22.62-9.375l-192-192c-12.5-12.5-12.5-32.75 0-45.25s32.75-12.5 45.25 0L224 338.8l169.4-169.4c12.5-12.5 32.75-12.5 45.25 0s12.5 32.75 0 45.25l-192 192C240.4 412.9 232.2 416 224 416z"/></svg>
</span>
</button>
</div>
<div class="cmplz-description" id="cmplz-desc-preferences-1-optin" hidden>
<span class="cmplz-description-preferences">Technical access or storage is necessary for the legitimate purpose of storing preferences not requested by the subscriber or Internet user.</span>
</div>
</div>
<div class="cmplz-category cmplz-statistics">
<div class="cmplz-category-header">
<span class="cmplz-category-title" id="cmplz-title-statistics-1-optin">Statistics</span>
<span class="cmplz-banner-checkbox">
<input type="checkbox"
id="cmplz-statistics-optin"
data-category="cmplz_statistics"
class="cmplz-consent-checkbox cmplz-statistics"
size="40"
value="1"/>
<label class="cmplz-label" for="cmplz-statistics-optin"><span class="screen-reader-text">Statistics</span></label>
</span>
<button class="cmplz-category-toggle"
aria-expanded="false"
aria-controls="cmplz-desc-statistics-1-optin"
aria-labelledby="cmplz-title-statistics-1-optin">
<span class="cmplz-icon cmplz-open">
<svg aria-hidden="true" focusable="false" xmlns="http://www.w3.org/2000/svg" viewbox="0 0 448 512" height="18"><path d="M224 416c-8.188 0-16.38-3.125-22.62-9.375l-192-192c-12.5-12.5-12.5-32.75 0-45.25s32.75-12.5 45.25 0L224 338.8l169.4-169.4c12.5-12.5 32.75-12.5 45.25 0s12.5 32.75 0 45.25l-192 192C240.4 412.9 232.2 416 224 416z"/></svg>
</span>
</button>
</div>
<div class="cmplz-description" id="cmplz-desc-statistics-1-optin" hidden>
<span class="cmplz-description-statistics">Storage or technical access that is used exclusively for statistical purposes.</span>
<span class="cmplz-description-statistics-anonymous">Technical storage or access that is used exclusively for anonymous statistical purposes. In the absence of a subpoena, voluntary compliance by your Internet service provider, or additional records from a third party, the information stored or retrieved for this sole purpose generally cannot be used to identify you.</span>
</div>
</div>
<div class="cmplz-category cmplz-marketing">
<div class="cmplz-category-header">
<span class="cmplz-category-title" id="cmplz-title-marketing-1-optin">Marketing</span>
<span class="cmplz-banner-checkbox">
<input type="checkbox"
id="cmplz-marketing-optin"
data-category="cmplz_marketing"
class="cmplz-consent-checkbox cmplz-marketing"
size="40"
value="1"/>
<label class="cmplz-label" for="cmplz-marketing-optin"><span class="screen-reader-text">Marketing</span></label>
</span>
<button class="cmplz-category-toggle"
aria-expanded="false"
aria-controls="cmplz-desc-marketing-1-optin"
aria-labelledby="cmplz-title-marketing-1-optin">
<span class="cmplz-icon cmplz-open">
<svg aria-hidden="true" focusable="false" xmlns="http://www.w3.org/2000/svg" viewbox="0 0 448 512" height="18"><path d="M224 416c-8.188 0-16.38-3.125-22.62-9.375l-192-192c-12.5-12.5-12.5-32.75 0-45.25s32.75-12.5 45.25 0L224 338.8l169.4-169.4c12.5-12.5 32.75-12.5 45.25 0s12.5 32.75 0 45.25l-192 192C240.4 412.9 232.2 416 224 416z"/></svg>
</span>
</button>
</div>
<div class="cmplz-description" id="cmplz-desc-marketing-1-optin" hidden>
<span class="cmplz-description-marketing">The storage or technical access is necessary to create user profiles to send advertisements, or to track the user across a website or multiple websites for similar marketing purposes.</span>
</div>
</div>
</div><!-- categories end -->
</div>
<div class="cmplz-links cmplz-information">
<ul>
<li><a class="cmplz-link cmplz-manage-options cookie-statement" href="#" data-relative_url="#cmplz-manage-consent-container" data-no-translation="" data-trp-gettext="">Gérer les options</a></li>
<li><a class="cmplz-link cmplz-manage-third-parties cookie-statement" href="#" data-relative_url="#cmplz-cookies-overview" data-no-translation="" data-trp-gettext="">Gérer les services</a></li>
<li><a class="cmplz-link cmplz-manage-vendors tcf cookie-statement" href="#" data-relative_url="#cmplz-tcf-wrapper" data-no-translation="" data-trp-gettext="">Manage {vendor_count} vendors</a></li>
<li><a class="cmplz-link cmplz-external cmplz-read-more-purposes tcf" target="_blank" rel="noopener noreferrer nofollow" href="https://cookiedatabase.org/tcf/purposes/" aria-label="Read more about TCF purposes on Cookie Database" data-no-translation="" data-trp-gettext="" data-no-translation-aria-label="">En savoir plus sur ces finalités</a></li>
</ul>
</div>
<div class="cmplz-divider cmplz-footer"></div>
<div class="cmplz-buttons">
<button class="cmplz-btn cmplz-accept">Accept</button>
<button class="cmplz-btn cmplz-deny">Refuse</button>
<button class="cmplz-btn cmplz-view-preferences">View preferences</button>
<button class="cmplz-btn cmplz-save-preferences">Save preferences</button>
<a class="cmplz-btn cmplz-manage-options tcf cookie-statement" href="#" data-relative_url="#cmplz-manage-consent-container">View preferences</a>
</div>
<div class="cmplz-documents cmplz-links">
<ul>
<li><a class="cmplz-link cookie-statement" href="#" data-relative_url="">{title}</a></li>
<li><a class="cmplz-link privacy-statement" href="#" data-relative_url="">{title}</a></li>
<li><a class="cmplz-link impressum" href="#" data-relative_url="">{title}</a></li>
</ul>
</div>
</div>
</div>
<div id="cmplz-manage-consent" data-nosnippet="true"><button class="cmplz-btn cmplz-hidden cmplz-manage-consent manage-consent-1" aria-haspopup="dialog" aria-controls="cmplz-cookiebanner-1-optin">Yes, we use cookies too</button>
</div><script id="wp-importmap" type="importmap">
{"imports":{"@wordpress/interactivity":"https://www.badsender.com/wp-includes/js/dist/script-modules/interactivity/index.min.js?ver=efaa5193bbad9c60ffd1"}}
</script>
<script data-wp-router-options="{"loadOnClientNavigation":true}" fetchpriority="low" id="activitypub-reactions-view-script-module-js-module" src="https://www.badsender.com/wp-content/plugins/activitypub/build/reactions/view.js?ver=c92a83cbb3c92ac4f478" type="module"></script>
<link rel="modulepreload" href="https://www.badsender.com/wp-includes/js/dist/script-modules/interactivity/index.min.js?ver=efaa5193bbad9c60ffd1" id="@wordpress/interactivity-js-modulepreload" fetchpriority="low">
<script>
( () => {
const lazyloadRunObserver = () => {
const lazyloadBackgrounds = document.querySelectorAll( `.e-con.e-parent:not(.e-lazyloaded)` );
const lazyloadBackgroundObserver = new IntersectionObserver( ( entries ) => {
entries.forEach( ( entry ) => {
if ( entry.isIntersecting ) {
let lazyloadBackground = entry.target;
if( lazyloadBackground ) {
lazyloadBackground.classList.add( 'e-lazyloaded' );
}
lazyloadBackgroundObserver.unobserve( entry.target );
}
});
}, { rootMargin: '200px 0px 200px 0px' } );
lazyloadBackgrounds.forEach( ( lazyloadBackground ) => {
lazyloadBackgroundObserver.observe( lazyloadBackground );
} );
};
const events = [
'DOMContentLoaded',
'elementor/lazyload/observe',
];
events.forEach( ( event ) => {
document.addEventListener( event, lazyloadRunObserver );
} );
} )();
</script>
<style id="core-block-supports-inline-css">
.wp-elements-cc86b9e16453901c05eb568d074f1664 a:where(:not(.wp-element-button)){color:var(--wp--preset--color--base);}.wp-elements-d6cd143b475b1f5c7fdff6b90ecc882d a:where(:not(.wp-element-button)){color:var(--wp--preset--color--base);}.wp-elements-40e4fbaddbf3e30ec9ad2a7ff7fede3e a:where(:not(.wp-element-button)){color:var(--wp--preset--color--base);}.wp-container-core-group-is-layout-d3f56f17{gap:0.2em;justify-content:center;}.wp-container-core-group-is-layout-4d4ed0f3 > :where(:not(.alignleft):not(.alignright):not(.alignfull)){max-width:60rem;margin-left:auto !important;margin-right:auto !important;}.wp-container-core-group-is-layout-4d4ed0f3 > .alignwide{max-width:60rem;}.wp-container-core-group-is-layout-4d4ed0f3 .alignfull{max-width:none;}.wp-container-core-group-is-layout-4d4ed0f3 > .alignfull{margin-right:calc(var(--wp--preset--spacing--32) * -1);margin-left:calc(var(--wp--preset--spacing--32) * -1);}.wp-container-core-group-is-layout-4d4ed0f3 > *{margin-block-start:0;margin-block-end:0;}.wp-container-core-group-is-layout-4d4ed0f3 > * + *{margin-block-start:12px;margin-block-end:0;}.wp-container-core-column-is-layout-b392f91c > *{margin-block-start:0;margin-block-end:0;}.wp-container-core-column-is-layout-b392f91c > * + *{margin-block-start:var(--wp--preset--spacing--16);margin-block-end:0;}.wp-container-core-columns-is-layout-c767d2a9{flex-wrap:nowrap;}.wp-container-core-group-is-layout-88776491 > .alignfull{margin-right:calc(var(--wp--preset--spacing--24) * -1);margin-left:calc(var(--wp--preset--spacing--24) * -1);}.wp-container-core-group-is-layout-c3a73512 > *{margin-block-start:0;margin-block-end:0;}.wp-container-core-group-is-layout-c3a73512 > * + *{margin-block-start:var(--wp--preset--spacing--32);margin-block-end:0;}.wp-container-core-social-links-is-layout-cad2de74{gap:var(--wp--preset--spacing--10) 0;justify-content:center;}.wp-container-core-group-is-layout-2a3a6351 > *{margin-block-start:0;margin-block-end:0;}.wp-container-core-group-is-layout-2a3a6351 > * + *{margin-block-start:var(--wp--preset--spacing--10);margin-block-end:0;}.wp-container-core-columns-is-layout-1ef73651{flex-wrap:nowrap;gap:var(--wp--preset--spacing--48) var(--wp--preset--spacing--32);}.wp-container-core-group-is-layout-4ec46fd7 > :where(:not(.alignleft):not(.alignright):not(.alignfull)){max-width:45rem;margin-left:auto !important;margin-right:auto !important;}.wp-container-core-group-is-layout-4ec46fd7 > .alignwide{max-width:45rem;}.wp-container-core-group-is-layout-4ec46fd7 .alignfull{max-width:none;}.wp-container-core-columns-is-layout-81c55c1a{flex-wrap:nowrap;}.wp-container-core-group-is-layout-0e75008e > :where(:not(.alignleft):not(.alignright):not(.alignfull)){max-width:960px;margin-left:auto !important;margin-right:auto !important;}.wp-container-core-group-is-layout-0e75008e > .alignwide{max-width:960px;}.wp-container-core-group-is-layout-0e75008e .alignfull{max-width:none;}.wp-container-core-group-is-layout-14e13169{justify-content:space-between;}.wp-container-core-columns-is-layout-f03ca32f{flex-wrap:nowrap;gap:var(--wp--preset--spacing--48) var(--wp--preset--spacing--10);}.wp-container-core-group-is-layout-9ba6dbca{flex-wrap:nowrap;}
/*# sourceURL=core-block-supports-inline-css */
</style>
<script id="wp-hooks-js" src="https://www.badsender.com/wp-includes/js/dist/hooks.min.js?ver=7496969728ca0f95732d"></script>
<script id="wp-i18n-js" src="https://www.badsender.com/wp-includes/js/dist/i18n.min.js?ver=781d11515ad3d91786ec"></script>
<script id="wp-i18n-js-after">
wp.i18n.setLocaleData( { 'text direction\u0004ltr': [ 'ltr' ] } );
//# sourceURL=wp-i18n-js-after
</script>
<script id="wp-url-js" src="https://www.badsender.com/wp-includes/js/dist/url.min.js?ver=bb0f766c3d2efe497871"></script>
<script id="wp-api-fetch-js" src="https://www.badsender.com/wp-includes/js/dist/api-fetch.min.js?ver=d7efe4dc1468d36c39b8"></script>
<script id="wp-api-fetch-js-after">
wp.apiFetch.use( wp.apiFetch.createRootURLMiddleware( "https://www.badsender.com/en/wp-json/" ) );
wp.apiFetch.nonceMiddleware = wp.apiFetch.createNonceMiddleware( "a24719c4d5" );
wp.apiFetch.use( wp.apiFetch.nonceMiddleware );
wp.apiFetch.use( wp.apiFetch.mediaUploadMiddleware );
wp.apiFetch.nonceEndpoint = "https://www.badsender.com/wp-admin/admin-ajax.php?action=rest-nonce";
//# sourceURL=wp-api-fetch-js-after
</script>
<script defer id="akismet-frontend-js" src="https://www.badsender.com/wp-content/plugins/akismet/_inc/akismet-frontend.js?ver=1777147677"></script>
<script async data-wp-strategy="async" fetchpriority="low" id="comment-reply-js" src="https://www.badsender.com/wp-includes/js/comment-reply.min.js?ver=d66d91a19f74769960d26f311980a29c"></script>
<script id="trp-dynamic-translator-js-extra">
var trp_data = {"trp_custom_ajax_url":"https://www.badsender.com/wp-content/plugins/translatepress-multilingual/includes/trp-ajax.php","trp_wp_ajax_url":"https://www.badsender.com/wp-admin/admin-ajax.php","trp_language_to_query":"en_US","trp_original_language":"fr_FR","trp_current_language":"en_US","trp_skip_selectors":["[data-no-translation]","[data-no-dynamic-translation]","[data-trp-translate-id-innertext]","script","style","head","trp-span","translate-press","[data-trp-translate-id]","[data-trpgettextoriginal]","[data-trp-post-slug]"],"trp_base_selectors":["data-trp-translate-id","data-trpgettextoriginal","data-trp-post-slug"],"trp_attributes_selectors":{"text":{"accessor":"outertext","attribute":false},"block":{"accessor":"innertext","attribute":false},"image_src":{"selector":"img[src]","accessor":"src","attribute":true},"submit":{"selector":"input[type='submit'],input[type='button'], input[type='reset']","accessor":"value","attribute":true},"placeholder":{"selector":"input[placeholder],textarea[placeholder]","accessor":"placeholder","attribute":true},"title":{"selector":"[title]","accessor":"title","attribute":true},"a_href":{"selector":"a[href]","accessor":"href","attribute":true},"button":{"accessor":"outertext","attribute":false},"option":{"accessor":"innertext","attribute":false},"aria_label":{"selector":"[aria-label]","accessor":"aria-label","attribute":true},"video_src":{"selector":"video[src]","accessor":"src","attribute":true},"video_poster":{"selector":"video[poster]","accessor":"poster","attribute":true},"video_source_src":{"selector":"video source[src]","accessor":"src","attribute":true},"audio_src":{"selector":"audio[src]","accessor":"src","attribute":true},"audio_source_src":{"selector":"audio source[src]","accessor":"src","attribute":true},"picture_image_src":{"selector":"picture image[src]","accessor":"src","attribute":true},"picture_source_srcset":{"selector":"picture source[srcset]","accessor":"srcset","attribute":true},"image_alt":{"selector":"img[alt]","accessor":"alt","attribute":true},"meta_desc":{"selector":"meta[name=\"description\"],meta[property=\"og:title\"],meta[property=\"og:description\"],meta[property=\"og:site_name\"],meta[property=\"og:image:alt\"],meta[name=\"twitter:title\"],meta[name=\"twitter:description\"],meta[name=\"twitter:image:alt\"],meta[name=\"DC.Title\"],meta[name=\"DC.Description\"],meta[property=\"article:section\"],meta[property=\"article:tag\"]","accessor":"content","attribute":true},"page_title":{"selector":"title","accessor":"innertext","attribute":false},"meta_desc_img":{"selector":"meta[property=\"og:image\"],meta[property=\"og:image:secure_url\"],meta[name=\"twitter:image\"]","accessor":"content","attribute":true}},"trp_attributes_accessors":["outertext","innertext","src","value","placeholder","title","href","aria-label","poster","srcset","alt","content"],"gettranslationsnonceregular":"c5ece1d4f3","showdynamiccontentbeforetranslation":"","skip_strings_from_dynamic_translation":[],"skip_strings_from_dynamic_translation_for_substrings":{"href":["amazon-adsystem","googleads","g.doubleclick"]},"duplicate_detections_allowed":"100","trp_translate_numerals_opt":"no","trp_no_auto_translation_selectors":["[data-no-auto-translation]"]};
//# sourceURL=trp-dynamic-translator-js-extra
</script>
<script id="trp-dynamic-translator-js" src="https://www.badsender.com/wp-content/plugins/translatepress-multilingual/assets/js/trp-translate-dom-changes.js?ver=3.2.4"></script>
<script id="smartmenus-js" src="https://www.badsender.com/wp-content/plugins/elementor-pro/assets/lib/smartmenus/jquery.smartmenus.min.js?ver=1.2.1"></script>
<script id="elementor-webpack-runtime-js" src="https://www.badsender.com/wp-content/plugins/elementor/assets/js/webpack.runtime.min.js?ver=4.2.0"></script>
<script id="elementor-frontend-modules-js" src="https://www.badsender.com/wp-content/plugins/elementor/assets/js/frontend-modules.min.js?ver=4.2.0"></script>
<script id="jquery-ui-core-js" src="https://www.badsender.com/wp-includes/js/jquery/ui/core.min.js?ver=1.13.3"></script>
<script id="elementor-frontend-js-before">
var elementorFrontendConfig = {"environmentMode":{"edit":false,"wpPreview":false,"isScriptDebug":false},"i18n":{"shareOnFacebook":"Share on Facebook","shareOnX":"Share on X","pinIt":"Pin it","download":"Download","downloadImage":"Download image","fullscreen":"Fullscreen","zoom":"Zoom","share":"Share","playVideo":"Play Video","previous":"Previous","next":"Next","close":"Close","a11yCarouselPrevSlideMessage":"Previous slide","a11yCarouselNextSlideMessage":"Next slide","a11yCarouselFirstSlideMessage":"This is the first slide","a11yCarouselLastSlideMessage":"This is the last slide","a11yCarouselPaginationBulletMessage":"Go to slide"},"is_rtl":false,"breakpoints":{"xs":0,"sm":480,"md":769,"lg":1057,"xl":1440,"xxl":1600},"responsive":{"breakpoints":{"mobile":{"label":"Mobile Portrait","value":768,"default_value":767,"direction":"max","is_enabled":true},"mobile_extra":{"label":"Mobile Landscape","value":880,"default_value":880,"direction":"max","is_enabled":false},"tablet":{"label":"Tablet Portrait","value":1056,"default_value":1024,"direction":"max","is_enabled":true},"tablet_extra":{"label":"Tablet Landscape","value":1200,"default_value":1200,"direction":"max","is_enabled":false},"laptop":{"label":"Laptop","value":1366,"default_value":1366,"direction":"max","is_enabled":false},"widescreen":{"label":"Widescreen","value":2400,"default_value":2400,"direction":"min","is_enabled":false}},"hasCustomBreakpoints":true},"version":"4.2.0","is_static":false,"experimentalFeatures":{"e_font_icon_svg":true,"container":true,"e_panel_promotions":true,"theme_builder_v2":true,"nested-elements":true,"global_classes_should_enforce_capabilities":true,"e_variables":true,"e_opt_in_v4_page":true,"e_components":true,"e_interactions":true,"e_widget_creation":true,"import-export-customization":true,"e_pro_atomic_form":true,"e_pro_collection_loop":true,"mega-menu":true,"e_pro_variables":true,"e_pro_interactions":true},"urls":{"assets":"https:\/\/www.badsender.com\/wp-content\/plugins\/elementor\/assets\/","ajaxurl":"https:\/\/www.badsender.com\/wp-admin\/admin-ajax.php","uploadUrl":"https:\/\/www.badsender.com\/wp-content\/uploads"},"nonces":{"floatingButtonsClickTracking":"086a840c60","atomicFormsSendForm":"5b17111a44"},"swiperClass":"swiper","settings":{"page":[],"editorPreferences":[]},"kit":{"viewport_mobile":768,"viewport_tablet":1056,"active_breakpoints":["viewport_mobile","viewport_tablet"]},"post":{"id":567971,"title":"Image%20convertie%20en%20HTML%20et%20CSS%20%3A%20Avantages%20et%20inconv%C3%A9nients","excerpt":"","featuredImage":"https:\/\/www.badsender.com\/wp-content\/uploads\/2024\/01\/pixel_email_visuel-1024x769.jpg"}};
//# sourceURL=elementor-frontend-js-before
</script>
<script id="elementor-frontend-js" src="https://www.badsender.com/wp-content/plugins/elementor/assets/js/frontend.min.js?ver=4.2.0"></script>
<script id="e-sticky-js" src="https://www.badsender.com/wp-content/plugins/elementor-pro/assets/lib/sticky/jquery.sticky.min.js?ver=4.2.0"></script>
<script id="cmplz-cookiebanner-js-extra">
var complianz = {"prefix":"cmplz_","user_banner_id":"1","set_cookies":[],"block_ajax_content":"0","banner_version":"70","version":"7.5.0","store_consent":"","do_not_track_enabled":"1","consenttype":"optin","region":"eu","geoip":"","dismiss_timeout":"","disable_cookiebanner":"","soft_cookiewall":"","dismiss_on_scroll":"","cookie_expiry":"365","url":"https://www.badsender.com/en/wp-json/complianz/v1/","locale":"lang=en&locale=en_US","set_cookies_on_root":"0","cookie_domain":"","current_policy_id":"32","cookie_path":"/","categories":{"statistics":"statistics","marketing":"marketing"},"tcf_active":"","placeholdertext":"Cliquez pour accepter les cookies {category} et activer ce contenu","css_file":"https://www.badsender.com/wp-content/uploads/complianz/css/banner-{banner_id}-{type}.css?v=70","page_links":{"eu":{"cookie-statement":{"title":"Politique de cookies ","url":"https://www.badsender.com/en/policy-of-cookies-eu/"},"privacy-statement":{"title":"Vie priv\u00e9e","url":"https://www.badsender.com/en/private-life/"}}},"tm_categories":"","forceEnableStats":"","preview":"","clean_cookies":"","aria_label":"Cliquez pour accepter les cookies {category} et activer ce contenu"};
//# sourceURL=cmplz-cookiebanner-js-extra
</script>
<script defer id="cmplz-cookiebanner-js" src="https://www.badsender.com/wp-content/plugins/complianz-gdpr/cookiebanner/js/complianz.min.js?ver=1781942831"></script>
<script id="cmplz-cookiebanner-js-after">
if ('undefined' != typeof window.jQuery) {
jQuery(document).ready(function ($) {
$(document).on('elementor/popup/show', () => {
let rev_cats = cmplz_categories.reverse();
for (let key in rev_cats) {
if (rev_cats.hasOwnProperty(key)) {
let category = cmplz_categories[key];
if (cmplz_has_consent(category)) {
document.querySelectorAll('[data-category="' + category + '"]').forEach(obj => {
cmplz_remove_placeholder(obj);
});
}
}
}
let services = cmplz_get_services_on_page();
for (let key in services) {
if (services.hasOwnProperty(key)) {
let service = services[key].service;
let category = services[key].category;
if (cmplz_has_service_consent(service, category)) {
document.querySelectorAll('[data-service="' + service + '"]').forEach(obj => {
cmplz_remove_placeholder(obj);
});
}
}
}
});
});
}
document.addEventListener("cmplz_enable_category", function(consentData) {
var category = consentData.detail.category;
var services = consentData.detail.services;
var blockedContentContainers = [];
let selectorVideo = '.cmplz-elementor-widget-video-playlist[data-category="'+category+'"],.elementor-widget-video[data-category="'+category+'"]';
let selectorGeneric = '[data-cmplz-elementor-href][data-category="'+category+'"]';
for (var skey in services) {
if (services.hasOwnProperty(skey)) {
let service = skey;
selectorVideo +=',.cmplz-elementor-widget-video-playlist[data-service="'+service+'"],.elementor-widget-video[data-service="'+service+'"]';
selectorGeneric +=',[data-cmplz-elementor-href][data-service="'+service+'"]';
}
}
document.querySelectorAll(selectorVideo).forEach(obj => {
let elementService = obj.getAttribute('data-service');
if ( cmplz_is_service_denied(elementService) ) {
return;
}
if (obj.classList.contains('cmplz-elementor-activated')) return;
obj.classList.add('cmplz-elementor-activated');
if ( obj.hasAttribute('data-cmplz_elementor_widget_type') ){
let attr = obj.getAttribute('data-cmplz_elementor_widget_type');
obj.classList.removeAttribute('data-cmplz_elementor_widget_type');
obj.classList.setAttribute('data-widget_type', attr);
}
if (obj.classList.contains('cmplz-elementor-widget-video-playlist')) {
obj.classList.remove('cmplz-elementor-widget-video-playlist');
obj.classList.add('elementor-widget-video-playlist');
}
obj.setAttribute('data-settings', obj.getAttribute('data-cmplz-elementor-settings'));
blockedContentContainers.push(obj);
});
document.querySelectorAll(selectorGeneric).forEach(obj => {
let elementService = obj.getAttribute('data-service');
if ( cmplz_is_service_denied(elementService) ) {
return;
}
if (obj.classList.contains('cmplz-elementor-activated')) return;
if (obj.classList.contains('cmplz-fb-video')) {
obj.classList.remove('cmplz-fb-video');
obj.classList.add('fb-video');
}
obj.classList.add('cmplz-elementor-activated');
obj.setAttribute('data-href', obj.getAttribute('data-cmplz-elementor-href'));
blockedContentContainers.push(obj.closest('.elementor-widget'));
});
/**
* Trigger the widgets in Elementor
*/
for (var key in blockedContentContainers) {
if (blockedContentContainers.hasOwnProperty(key) && blockedContentContainers[key] !== undefined) {
let blockedContentContainer = blockedContentContainers[key];
if (elementorFrontend.elementsHandler) {
elementorFrontend.elementsHandler.runReadyTrigger(blockedContentContainer)
}
var cssIndex = blockedContentContainer.getAttribute('data-placeholder_class_index');
blockedContentContainer.classList.remove('cmplz-blocked-content-container');
blockedContentContainer.classList.remove('cmplz-placeholder-' + cssIndex);
}
}
});
//# sourceURL=cmplz-cookiebanner-js-after
</script>
<script id="elementor-pro-webpack-runtime-js" src="https://www.badsender.com/wp-content/plugins/elementor-pro/assets/js/webpack-pro.runtime.min.js?ver=4.2.0"></script>
<script id="elementor-pro-frontend-js-before">
var ElementorProFrontendConfig = {"ajaxurl":"https:\/\/www.badsender.com\/wp-admin\/admin-ajax.php","nonce":"f6cd4d5099","urls":{"assets":"https:\/\/www.badsender.com\/wp-content\/plugins\/elementor-pro\/assets\/","rest":"https:\/\/www.badsender.com\/en\/wp-json\/"},"settings":{"lazy_load_background_images":true},"popup":{"hasPopUps":false},"shareButtonsNetworks":{"facebook":{"title":"Facebook","has_counter":true},"twitter":{"title":"Twitter"},"linkedin":{"title":"LinkedIn","has_counter":true},"pinterest":{"title":"Pinterest","has_counter":true},"reddit":{"title":"Reddit","has_counter":true},"vk":{"title":"VK","has_counter":true},"odnoklassniki":{"title":"OK","has_counter":true},"tumblr":{"title":"Tumblr"},"digg":{"title":"Digg"},"skype":{"title":"Skype"},"stumbleupon":{"title":"StumbleUpon","has_counter":true},"mix":{"title":"Mix"},"telegram":{"title":"Telegram"},"pocket":{"title":"Pocket","has_counter":true},"xing":{"title":"XING","has_counter":true},"whatsapp":{"title":"WhatsApp"},"email":{"title":"Email"},"print":{"title":"Print"},"x-twitter":{"title":"X"},"threads":{"title":"Threads"}},"facebook_sdk":{"lang":"en_US","app_id":""},"lottie":{"defaultAnimationUrl":"https:\/\/www.badsender.com\/wp-content\/plugins\/elementor-pro\/modules\/lottie\/assets\/animations\/default.json"}};
//# sourceURL=elementor-pro-frontend-js-before
</script>
<script id="elementor-pro-frontend-js" src="https://www.badsender.com/wp-content/plugins/elementor-pro/assets/js/frontend.min.js?ver=4.2.0"></script>
<script id="pro-elements-handlers-js" src="https://www.badsender.com/wp-content/plugins/elementor-pro/assets/js/elements-handlers.min.js?ver=4.2.0"></script>
<!-- Statistics script Complianz GDPR/CCPA -->
<script data-category="functional">var _paq = window._paq || [];
_paq.push(['trackPageView']);
_paq.push(['enableLinkTracking']);
_paq.push(['requireCookieConsent']);
(function() {
var u="https://analytics.badsender.com/";
_paq.push(['setTrackerUrl', u+'matomo.php']);
_paq.push(['setSiteId', '2']);
_paq.push(['setSecureCookie', window.location.protocol === "https:" ]);
var d=document, g=d.createElement('script'), s=d.getElementsByTagName('script')[0];
g.type='text/javascript'; g.async=true; g.src=u+'matomo.js'; s.parentNode.insertBefore(g,s);
})();
document.addEventListener("cmplz_fire_categories", function (e) {
var consentedCategories = e.detail.categories;
if (!cmplz_in_array( 'statistics', consentedCategories )) {
_paq.push(['forgetCookieConsentGiven']);
} else {
_paq.push(['rememberCookieConsentGiven']);
}
});
</script></body>
</html>
<!-- Cached by WP-Optimize (gzip) - https://teamupdraft.com/wp-optimize/ - Last modified: 21/07/2026 22h36 (Europe/Paris UTC:2) -->